If you’ve been told you need a root canal, you’re not alone — and you’re not doomed to pain and stress. Root canal therapy is a highly effective and safe procedure that can save a severely damaged or infected tooth. Understanding the root canal treatment steps can help reduce fear and increase your confidence about the process.
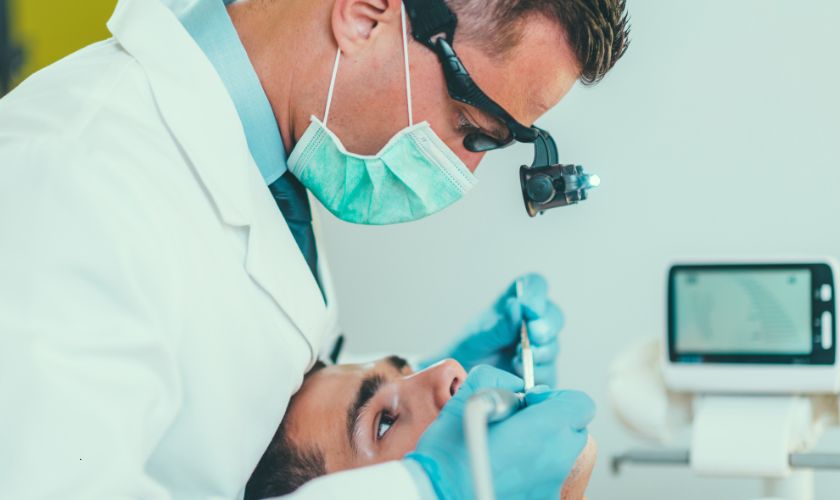
At our Dental Office in Portland City, we’ve helped countless patients restore their oral health with precision and comfort. Let’s walk you through the procedure of root canal treatment step-by-step and address some common concerns along the way.
What Is a Root Canal?
A root canal is a dental procedure that removes the infected or inflamed pulp inside a tooth. The pulp contains blood vessels, nerves, and connective tissues. Once it’s removed, the space is cleaned, filled, and sealed to prevent further infection.
This guide will take you through the root canal treatment step by step so you know exactly what to expect, from your first appointment to full recovery.
A Guide to Root Canals: Step-by-Step
Step 1: Diagnosis and X-Ray
The first step of root canal treatment begins with an examination and diagnostic X-rays. Your dentist or endodontist will check for signs of infection or inflammation in the pulp. X-rays help determine the shape of the root canals and identify any infection in the surrounding bone.
Step 2: Local Anesthesia
Next, local anesthesia is administered to numb the affected tooth and the surrounding area. This step ensures you feel minimal discomfort during the procedure. Most patients say the anesthesia shot is no more painful than a typical dental filling.
Which step is painful in root canal treatment?
While people worry about pain, the actual procedure is typically not painful. The discomfort you feel is usually from the infection itself, not the treatment. Thanks to modern anesthesia, the process is very tolerable.
Step 3: Tooth Isolation
A rubber dam (a small sheet) is placed around the tooth to keep it dry and free from saliva. This barrier also prevents any debris from falling into your mouth during treatment.
Step 4: Opening the Tooth
Your local dental care clinic will create an opening in the crown of the tooth to access the pulp chamber and root canals. Specialized tools are used to clean out the infected or dead pulp tissue.
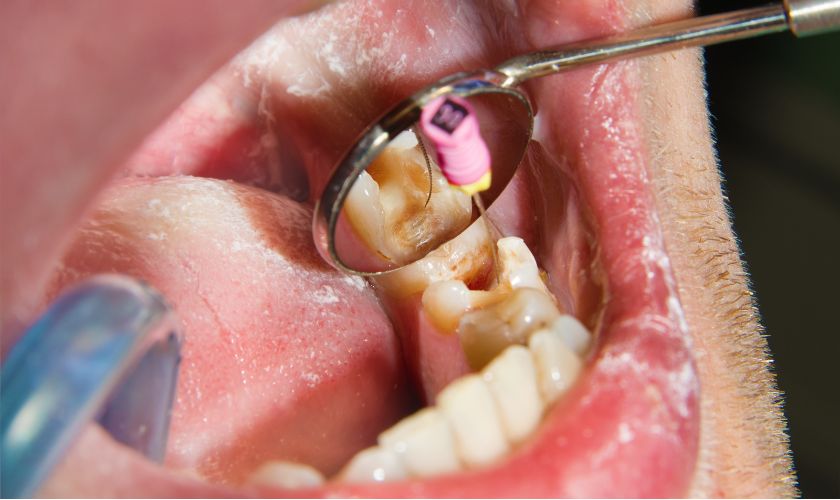
Step 5: Cleaning and Shaping the Canals
The process of filling a root canal begins by shaping the canals to prepare them for filling. Small files are used to scrub and clean the inner walls, while antibacterial solutions flush out any remaining bacteria.
This cleaning stage is crucial to eliminate infection and prevent recurrence. Root canal treatment step-by-step images may be shown to help patients understand the stages during consultation.
Step 6: Filling the Canals
After cleaning, the canals are dried and filled with a rubber-like material called gutta-percha. This seals the space and prevents future bacterial infection. A temporary filling is placed to protect the tooth until a crown can be installed.
Step 7: Restoration (Crown Placement)
Once the inside of the tooth is sealed, a permanent crown is placed on the tooth to restore strength, appearance, and function. In many cases, your final crown is placed within a week or two after the initial procedure.
Root canal before and after comparisons show just how much of a difference a proper restoration can make in both appearance and comfort.
Root Canal Instructions: Aftercare and Recovery
Root Canal Recovery Time
Most patients recover within a few days, but mild discomfort or tenderness may persist for a few days as inflammation subsides. You can resume normal activities within 24 – 48 hours, but follow your dentist’s post-op instructions carefully.
Which Thing Is Avoided After a Root Canal?
Avoid chewing on the treated tooth until your permanent crown is in place. Sticky or hard foods can damage the temporary filling or increase the risk of cracking the tooth. Also, avoid very hot or cold foods immediately after treatment to prevent sensitivity.
Best Food After Root Canal Treatment
Soft, nourishing foods are ideal right after the procedure. Some safe options include:
- Mashed potatoes
- Smoothies (not too cold)
- Yogurt
- Scrambled eggs
- Soups (lukewarm)
- Applesauce
Avoid crunchy snacks, nuts, and sticky candy for at least a few days.
Why Choose a Professional Dental Office in Portland City?
We provide advanced root canal treatment in a caring and comfortable environment. We use state-of-the-art equipment to ensure precision and minimize discomfort throughout every phase of the root canal treatment procedure.
Our dental professionals guide you through pre-op preparation, root canal instructions, and follow-up care to help you recover quickly and safely.
Conclusion: Root Canals Don’t Have to Be Scary
Understanding the procedure of root canal helps eliminate much of the anxiety surrounding it. Thanks to modern techniques, root canal therapy today is as straightforward and manageable as getting a filling. With the right dental care, you can save your natural teeth and restore your healthy smile.